Translate

Tuesday, 22 January 2013

Chocolate Cupcakes with Crunchy Fried Corn - Cupcakes de Chocolate y Kikos!


Fried corn? Has she gone mad? No, absolutely not! Actually fried corn or Kikos (as they are called in spain) match perfectly well with chocolate! They add a salty and crunchy twist that will make you a fan of this couple immediately!
Let me tell how I came up with this idea...

For a while ago I've been wanting to try a new vanilla cupcake recipe, as I'm always eager to experiment with new recipes.
The cake turned out pretty good, not too sweet, so this meant that it could be topped either with a sweet buttercream or ganache. But which one? A classic vanilla or chocolate? 
I decided to go with chocolate, however the little voice in my head kept on saying "that's too boring, do something fun, creative and original".
Suddenly a little bulb lit on top of my head! What if I add some crushed Kikos to the frosting? If there are recipes with walnuts, almonds or hazelnuts, why not this?!
So without giving it a second thought I proceeded to create this delicious treat!

¿Maíz frito? ¿Se ha vuelto loca? No, para nada! En realidad el maíz frito o Kikos  (como los llamamos aquí en España) hacen una estupenda pareja con el chocolate! Le añaden un toque salado y crujiente que te enganchará a este "matrimonio" inmediatamente!
Dejadme que os cuente cómo se me ocurrió esta idea...

Desde hace un tiempo llevo queriendo probar una nueva receta de cupcakes de vainilla  ya que siempre estoy dispuesta a experimentar con nuevas recetas.
El bizcocho salió fantástico, no demasiado dulce, por lo que pedía ser cubierto con un buttercream o ganache dulce. ¿Pero cuál? ¿El clásico de vainilla  o chocolate?
Opté por el de chocolate, pero la vocecita de mi cabeza me decía " eso es demasiado aburrido, haz algo divertido, creativo y original". 
De repente se me iluminó una bombilla sobre mi cabeza! ¿Y se le añado unos kikos machacados a la cobertura? Si hay recetas que llevan nueces, almendras o avellanas, ¿por qué no esto?!
Y sin pensarmelo dos veces me decidí a llevar a cabo esta deliciosa creación!


 First ground the kikos
Primero tritura los kikos

Mix with the ganache or chocolate buttercream (whatever you like!)
Mezclalo con la ganache o buttercream (lo que prefieras!)


Prepare a piping bag...
Prepara una manga pastelera...

ET VOILÁ!
Ingredients for the vanilla cupcakes:
1 1/4 cups cake flour
1 1/4 teaspoons baking powder
1/2 teaspoon salt
2 eggs
3/4 cups sugar
1 1/2 teaspoon vanilla extract
1/2 cup vegetable oil
1/2 cup buttermilk

In a bowl stir the flour, baking powder and salt, set aside.
Beat eggs, add sugar gradually. Add vanilla and oil, keep beating.
Slowly add half of the flour mixture and half of the buttermilk, beat well and add the rest. Beat until combined.
Pour the batter into the cups and bake at 180ºC for 12 to 14 minutes.

Ingredients for the chocolate and kikos frosting:
75 gr dark chocolate
100 ml cream
65 gr butter
100 gr icing sugar
crushed kikos

In a pan, heat the cream with the butter, once it's melted and before it boils add the chocolate. When the chocolate has melted add the sugar. Stir until well combined.
Let it cool in the fridge, and once it's thick and creamy add the crushed kikos.

Ingredientes para los cupcakes de vainilla:
1 1/4 tazas de harina de reposteria
1 1/4 cucharaditas de levadura
1/2 cucharadita de sal
2 huevos
3/4 taza de azúcar
1 1/2 cucharadita de extracto de vainilla
1/2 taza aceite vegetal
1/2 taza buttermilk

Mezclar la harina, levadura y sal. Dejar aparte.
Batir los huevos y añadir poco a poco el azúcar. Incorporar la vainilla y el aceite.
Añadir la mitad de la mezcla de la harina y del buttermilk, batir bien, finalmente añadir el resto que queda.
Poner la masa en los moldes individuales y cocinar en el horno a 180ºC durante 12-14 minutos.

Ingredientes para la cobertura de chocolate y kikos:
75 gr chocolate negro para postres
100 ml nata líquida
65 gr mantequilla
100 gr azúcar glaçé
kikos machacados

En una cacerola, calentar la nata con la mantequilla, una vez ésta se haya derretido y antes de que hierva se añade el chocolate. Cuando el chocolate esté derretido incorporar el azúcar. Mezclar bien.
Enfriar en la nevera hasta que esté cremoso y espeso. Mezclar los kikos machacados.


Wednesday, 16 January 2013

Braulia's Polvorones - Los Polvorones de Braulia


I want to apologize for not having been updating new posts and recipes, but the last weeks have been awfully hectic; from Christmas holidays, to small trips to the South of France and even a bachelorette party weekend in Seville (not mine if you're wondering!).
Anyway, we are back and really looking forward to this new year!

Quiero disculparme por no haber actualizado nuevos posts y recetas, pero he pasado varias semanas tremendamente ajetreadas; desde las vacaciones de Navidad, a viajes relámpago al sur de Francia e incluso una despedida de soltera en Sevilla (no era la mía por si os lo estabais preguntando!).
En fín, estamos de vuelta y con muchas ganas de ver que  nos depara este año nuevo!


So, less talking and more baking!
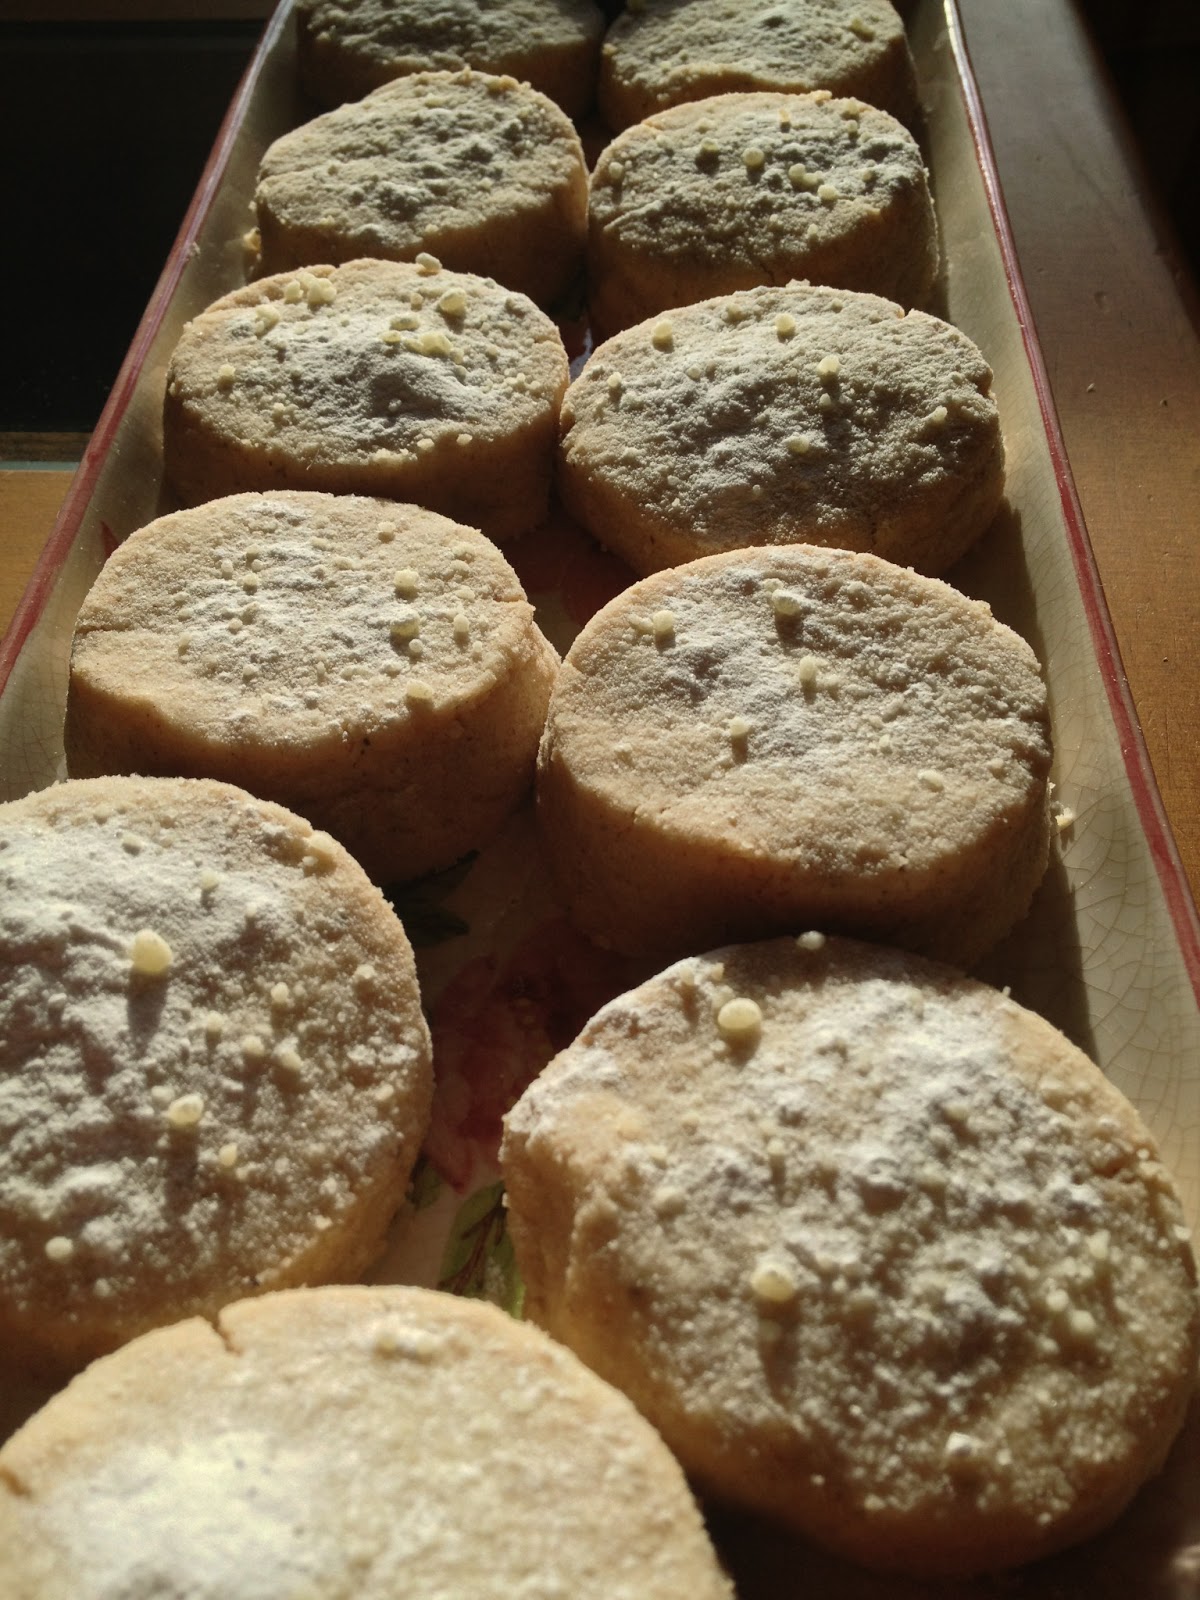
For today I have a traditional and delicious Spanish Christmas sweet: Polvorones.
They are extremely simple to make, and highly addictive too!
Do you want to know the best part? It just has 4 ingredients: flour, sugar, lard and cinnamon. All mixed together, baked in the oven; et voilá!
If you've never tried them, I really don't know what you're waiting for? There really is no excuse not to eat them!


Bueno, menos cháchara y más cocinar!
Para hoy tengo un dulce navideño típico Español: Polvorones.
Son tremendamente fáciles de elaborar, y muy adictivos también!
¿Quieres saber la mejor parte? Solamente tiene 4 ingredientes: harina, azúcar, manteca de cerdo y canela. Se mezclan todos y después se hornean; et voilá!
Si nos los has probado,¿a qué estás espeando? No hay excusa que valga para no comerlos!


Monday, 31 December 2012

Happy New Year - Feliz Año Nuevo


 Our dinner table.
Nuestra mesa.

From Braulia's Kitchen we wish everyone a very happy new year 2013. Superstitions aside we're sure this will be a great year!
To say goodbye I'll leave you with a little sneak peak of our Christmas Eve dinner!

Roast Turkey(stuffed with pain d'epices, minced pork meat, chestnuts, pine nuts, raisins, prunes, truffle and port wine)
Pavo asado (relleno con pain d'epices, carne de cerdo picada, castañas, piñones, pasas, ciruelas, trufa y oporto)

Desde Braulia's Kitchen queriamos desear a todo el mundo un muy feliz año nuevo 2013. Echando a un lado cualquier superstición estamos seguras que este será un gran año!
Para despedirme os dejo un pequeño adelanto de lo que fue nuestra cena de Noche Buena!

Foie Gras with caramelised onions, king prawns, Smoked salmon from Ramest with blinis and creme fraiche
Foie Gras con cebolla caramelizada, Langostinos, Salmon ahumado de Ramest con blinis y creme fraiche

 Roast Turkey with the stuffing on the side, chestnut puree, apple sauce and red cabbage
Pavo asado con el relleno aparte, puré de castañas y de manzana y lombarda
And for dessert...

Y de postre...
Bûche de Noël

Mango mousse filled with fresh passion fruit pulp over a base of homemade meringuettes, covered with a white chocolate ganache and decorated with fresh pomegranate and more meringuettes!

Mousse de mango relleno de pulpa de maracuyá sobre una base de mini merengues caseros, cubierto con ganache de chocolate blanco y decorado con granada y mas merenguitos!


Saturday, 22 December 2012

Mission Perfect Macaron (Part 1) - Misión Macaron Perfecto (Parte 1)

At Braulia's Kitchen we're on a mission, make THE PERFECT MACARON!

En Braulia's Kitchen tenemos una misión, crear EL MACARON PERFECTO!


We've never been huge fans of Macarons, we don't love them but don't dislike them either. We've obviously tried the best of the best in France at Laduree, Pierre Herme and Thierry Bamas, and even at Picard, but we never felt it was that kind of dessert that you can't live without.
But if you really want to become a great baker, you must do every recipe and dessert, and you must masterize it.
So after thinking about it over and over again, we finally came to the following conclusion: We MUST make Macarons, and they'll be outstanding!
We've been researching, documenting, reading every single recipe, tip, review, article... Basically every 101 on Macaron out there, just to know what was awaiting us.
Apparently to reach the goal a perfect Macaron needs to have the following:
  • Smooth tops (no bubbles or tips from when pipping them).
  • The outside must be crispy, whilst the inside will be nice, moist and chewy, what the french call "moelleux".
  • It will always have a foot at the bottom of the shell - no foot no Macaron.
  • A perfect round shape (really important) so the top and bottom shells can match once they are put together. 
Nunca hemos sido grandes fans de los Macarons, no los amamos, pero tampoco nos disgustan. Claramente hemos probado lo mejor de lo mejor que hay en Francia, cómo los de Laduree, Thierry Bamas, Pierre Herme e incluso los de Picard, pero nunca hemos tenido esa sensación que era un postre con el cual nos era imposible vivir sin él.
Pero si realmente quieres ser un experto en pastelería , tienes que probar todas las recetas y postres que hay y se deben dominar.  

Así que después de pensarlo una y otra vez, por fin llegamos a la siguiente conclusión: hay que hacer Macarons, y van a salir estupendos!
Hemos estado investigando, documentándonos, leyendo todas las diferentes recetas, artículos, consejos... Básicamente cada 101 que hay sobre los Macaron, sólo para saber lo que nos esperaba.
Al parecer, para alcanzar la meta de un Macaron perfecto éste debe tener lo siguiente:

  •  Una superficie completamente lisa (sin burbujas o puntas que pueden salir a causa de la manga pastelera).
  • Por fuera deben ser crujientes, mientras que el interior tiene que ser suave, un poco chicloso, lo que los franceses llaman "moelleux". 
  • La parte inferior de la carcasa siempre tiene un pie - si no hay pie no hay Macaron.
  •  Una perfecta forma redonda (esto es realmente importante) para que tanto la carcarsa superior como la inferior encajen bien.
Having these basic rules in mind, ahead we went to create our first Macaron.

Teniendo en mente estas normas básicas, decidimos seguir adelante y crear nuestro primer Macaron.


The results we actually better than expected; the taste was fantastic (believe me when I say this, as I myself don't fancy Macarons that much!), the consistency was great, and they did look very pretty too.
But of course they weren't perfect! Our main concerns right now are improving the shape and finding the perfect oven temperature and cooking time.
So we'll keep on practicing in order to reach perfection!
Beware Laduree, we are close to making just as great macarons as yours!

Los resultados fueron mejor de lo esperado; de sabor salieron fantásticos (creerme cuando digo esto porque los macarons no están dentro de mis gustos favoritos!), con muy buena consistencia, y visualmente preciosos.
Pero claro no eran perfectos! Ahora nuestros objetivos son mejorar la forma y controlar la temperatura y tiempo del horno.
Por lo que vamos a seguir practicando para llegar a la perfección!
Ojito Laduree, estamos muy cerca de hacer Macarons tan buenos como los vuestros!


Saturday, 15 December 2012

Chocolate & Coconut Battenberg Cake - Battenberg de Chocolate y Coco


Is there any culinary marriage better than chocolate and coconut? I don't think so!
They are so great together in biscuits, mousses, candy bars (who doesn't love Bounty or Almond Joy?), and of course in cakes. At home we are huge fans of this couple and we hope they last forever!

This week we decided to re-invent the classic english Battenberg Cake, but instead of making it the traditional way with the almond taste and apricot jam, we gave it a twist using chocolate and coconut!
 It came out sooooo deliciously good I really can't wait to bake it again!


¿Hay algún matrimonio culinario mejor que el chocolate y el coco? No lo creo!
 Hacen tan buena pareja tanto en galletas, como mousses, chocolatinas (¿a quién no le encanta Bounty o Almond Joy?), y por supuesto en tartas. En casa somos grandes admiradores de esta pareja y esperemos que duren para siempre!

Esta semana decidimos re-inventar el clásico pastel británico Battenberg, en vez de cocinarlo a la manera tradicional con el sabor a almendra y la mermelada de albaricoque, quisimos darle un cambio usando chocolate y coco!
Salió tan deliciosamente rico, no veo el momento de volver a hacerlo!

 Ingredients 
For the coconut cake:
100 g softened butter
20 g of creme fraiche
180 g sugar 
1 packet of vanilla sugar
3 eggs 
150 g shredded coconut 
40 g all purpose flour 
1 pinch of salt
1 teaspoon baking powder
1/4 cup milk (or more if you want the cake less thick)

Directions:
Mix butter, cream, sugar and vanilla sugar.
Add eggs, coconut and milk.
Finish with the flour, salt baking powder.
Bake at 180 ° for 25 minutes

 
For the chocolate fondant: 

100 g dark chocolate 
150 g butter
30 g creme fraiche
180 g sugar
3 eggs
50 g flour
Pinch of salt
1 teaspoon baking powder
Directions: 
Melt the chocolate, butter and cream. Mix well.
Separate the egg yolks from the whites.
Add sugar and the egg yolks to the chocolate mixture. Then the flour, baking powder and salt.
Beat the egg whites and fold in gently the mixture.
Pour into pan and bake at 180 degrees for 25 minutes.

 
For the ganache (to stick the layers and cover the cake):

200 g dark chocolate
300 g cream
65 g butter
Directions

Heat the cream and remove from heat before boiling. Add the chocolate into small pieces and the butter. Mix well.
Use the ganache to glue the parts together and cover it all with the rest of the ganache.
Refrigerate.


Ingredientes
Para el pastel de coco:
100 g de mantequilla blanda
20 g de nata creme fraiche o nata espesa
180 g de azúcar
1 paquete de azúcar avainillada
3 huevos
150 g de coco rallado
40 g de harina de trigo
1 pizca de sal
1 cucharadita de levadura
1/4 taza de leche (o un poquito más si veis que la masa está muy espesa) 

Instrucciones:
Mezclar la mantequilla, creme fraiche, azúcar y azúcar avainillada.
Añadir los huevos, el coco y la leche. 

Terminar con la harina, la levadura y sal.
Hornear a 180 ºC durante 25 minutos

Para el fondant de chocolate:
100 g de chocolate negro
150 g de mantequilla
30 g creme fraiche
180 g de azúcar
3 huevos
50 g de harina
Una pizca de sal
1 cucharadita de levadura
Instrucciones:
Derretir el chocolate, la mantequilla y la nata. Mezclar bien.
Separar las yemas de las claras.
Añadir el azúcar y las yemas a la mezcla de chocolate. A continuación, la harina, la levadura y sal.
Batir las claras de huevo y envolver suavemente en la mezcla de chocolate. 

Hornear a 180ºC durante 25 minutos.

Para el ganache (para pegar las capas y cubrir la tarta):
200 g de chocolate negro
300 g de nata líquida
65 g de mantequilla 

Instrucciones:
Calentar la nata y retirar del fuego antes de hervir. Añadir el chocolate en trozos pequeños y la mantequilla. Mezclar bien.
Usa el ganache para pegar las piezas juntas se cubre todo con el resto de la tarta con el resto de ganache.
Refrigerar.


Tuesday, 11 December 2012

Pumpkin Dinner Rolls with a Honey Orange Butter


Christmas is just round the corner, and if you want to impress family and friends, this is THE RECIPE!
It's really simple, and the results are better than expected! And what I personally most love? Using one of my favourite seasonal vegetables - PUMPKIN!

Serve them with a whipped honey and orange (using both zest and fresh juice) butter. It will blow your mind!

Navidad está a la vuelta de la esquina, y si quiereis impresionar a los amigos y familia, esta es LA RECETA!
Es muy simple, y los resultados son mejor de lo esperado! Y lo que más me gusta de ella? Que utiliza una de mis verduras de temporada preferida - CALABAZA!

Sirvelos con una mantequilla de naranja (usando ralladura y zumo) y miel batida. Te dejará KO!


Ingredients:
2 packages active dry yeast plus 1 teaspoon white sugar
1/4 cup hot water
3/4 cup whole milk, scalded and cooled
1 cup of steemed and pureed pumpkin
1/3 cup light brown sugar
1/3 cup white sugar
6 tablespoons butter
1 egg
1/4 teaspoon salt
5 cups all-purpose flour

First of all, scald the milk for about 3 minutes in the microwave in a small glass bowl. Add in the 6 tablespoons of butter, stir until melted.  Then add in both sugars and pumpkin puree.  Place this mixture in the bowl of your electric mixer.
In another bowl add the yeast, the teaspoon of sugar and the 1/4 cup of hot water. Gently stir and allow the mixture to puff up. Once the yeast mixture looks foamy and puffy (about 3 minutes) add it to the pumpkin mixture in the mixing bowl, add the egg.  Now gradually add in the flour, one cup at a time. The dough should be soft, if it is too sticky add a bit more flour.
Remove the dough from the mixing bowl and place on a lightly floured surface.  Knead the flour for about 1 more minute and form into a round ball.  Place the dough ball in a bowl, covered, and put in a warm place until the dough has doubled.
Once the dough has doubled,  roll into a small balls (the size of a golf ball aproximately).


Place the rolls in to a baking dish, spaced about 2 inches apart.  Cover lightly with plastic wrap and set aside, in a warm environment, until they have doubled again and look light and puffy.
Pre-heat your oven to 180ºC.
Brush the rolls with egg and poppy seeds or linseed.


Bake each dish for about 8 to 10 minutes, or until golden brown.

 Ingredientes:

2 paquetes de levadura seca de panaderia más 1 cucharadita de azúcar blanco
1/4 taza de agua caliente
3/4 taza de leche entera, escaldada y enfriada
1 taza de puré de calabaza

1/3 taza de azúcar morena
1/3 taza de azúcar blanca
6 cucharadas de mantequilla
1 huevo
1/4 cucharadita de sal
5 tazas de harina 

Primero se escalda la leche durante unos 3 minutos en el microondas. Añadir las 6 cucharadas de mantequilla y remover hasta que se derrita. Una vez esté listo incorporar los 2 azúcares y el puré de calabaza, batir hasta que este bien mezclado. Después se vierte esta mezcla en el bol del batidor eléctrico.

En otro cuenco se añade la levadura, la cucharadita de azúcar y el 1/4 taza de agua caliente. Revolver suavemente y dejar que la mezcla se hinche. Una vez la mezcla de la levadura esté hinchada y espumosa (unos 3 minutos) se incorpora a la mezcla de calabaza. 
Empieza a batir la masa, añade el huevo y poco a poco la harina. La masa debe quedar suave, pero si es demasiado pegajosa, añade un poco más de harina.
Una vez esté lista la masa del recipiente, se coloca sobre una superficie ligeramente enharinada y se amasa hasta que se forme una bola redonda.  
Colocar la bola de masa en un bol, tapado, y poner en un lugar cálido para que duplique su tamño.Una vez duplicado, se hacen unas bolas pequeñas (del tamaño de una pelota de golf ) y dejar en una fuente para horno, un poco separados unos de otros.
Cubrir con film y dejar que se dupliquen de nuevo.
Pre-calentar el horno a 180 º C.
Pintar los rollitos con huevo batido y espolvorear por encima  semillas de amapola y lino.

Hornear cada fuente durante unos 8 a 10 minutos o hasta que estén doradas.


Et voilá serve warm with the orange honey butter! 

Et voilá servirlos calentitos con la mantequilla de naranja y miel


Monday, 10 December 2012

Pastelitos de Guayaba - Guava Pastries


There are several desserts, scents and flavours that bring back childhood memories, such as my mother's thin chewy chocolate chip cookies or a tart lemon buttercream frosting over a dark chocolate cupcake. But there's one I most love, Cuban Guava Pastries!
I believe the first time I tried them I was probably 8 or 9 years old, when a good cuban friend of ours brought some home. Once I tried them I couldn't stop myself from eating one after another, sadly for my diet, that still happens! But who cares! They taste soooo yummy, and they are really easy to make!

You will just need: Puff pastry (homemade or store bought, guava paste (also homemade if you are lucky enough to find the fruit, or store bought), creamcheese (optional), one beaten egg and sugar to garnish over them.

Hay varios postres, olores y sabores que me traen recuerdos de mi infancia, como las finas y crujientes chocolate chip cookies de mi madre o el buttercream de limón con un toque ácido sobre un cupcake de chocolate bien oscuro. Pero uno de los que más me gustan son los Pastelitos de Guayaba!
Creo que la primera vez que los probé debía tener unos 8 ó 9 años, cuando una amiga de la familia, que es cubana, los trajo a casa. Tras haberlos probado ya no me podía controlar y me comí uno tras otro, tristemente para mi dieta, eso sigue pasando! Pero me da igual! Están taaaaaan ricos, y son tan fáciles de hacer!

Para prepararlos solamente necesitarás masa de hojaldre (casera o comprada), dulce de guayaba (también casera si consigues encontrar la fruta en sí, o sino comprada), queso crema (opcional), un huevo batido y azúcar para poner encima de los pastelitos.

First roll out the puff pastry and add a bit of the guava paste. To some of them we added creamcheese and a walnut, just to experiment and give it an extra crunch.

Primero extiende el hojaldre y añade un poco del dulce de guayaba. Para algunos pusimos un poco de queso crema y por experimentar una nuez para añadirle un toque crujiente.


Ready to be baked in the oven!
 

Listos para cocinarse en el horno!

Et voilá!

Et voilá!


This is how the ones with creamcheese looked like!

Así quedaron los que llevaban crema de queso!


And the experiment with the walnut turned out fantastic and delicious!

Y el experimento con las nueces quedó fantástico y delicioso!