Translate

Wednesday, 6 February 2013

Mission Perfect Macaron Part 2 (both sweet and savory) - Misión Macaron Perfecto Parte 2 (tanto dulce cómo salado)


So here we are back again on our mission of creating THE Perfect Macaron, and let me update you that we're almost getting there, we're soooooo close to it!!

Let's make a recap; on the last post I explained what were the main facts a perfect macaron must have (foot, shape, crunchy outside, chewy inside etc...). Well after researching we've discovering a few more important facts:
  • The egg whites: No store bought (don't be lazy and crack the eggs yourself!). It's better if you separate the egg yolks from the whites at home; preferrably from non fresh eggs (not old eggs that have been over a month in your fridge!). But eggs that haven't been just bought, maybe 1 or 2 days old (aproximately). Also, REALLY IMPORTANT, two days before you make the macarons, separate the egg whites from the yolks and leave them in a bowl in the fridge (cover it well!). Now, the night before you make them take the egg whites out of the fridge and leave it overnight in the kitchen at room temperature. Don't be scared or worried about this, because this is how REAL macarons are made, every single french pastry chef does it, so if they do it, we too!
  •  Food coloring:  It's best if you use either food coloring in gel or powdered dust. The results will be fantastic!
  • Temperature: 150ºC upper and lower heat without the fan on, and bake for 17 minutes. Anyway I suggest you keep an eye, you don't want these little babies to burn!
  • Piping tip: After trying with different sizes, we've found out the best for macarons is the tip number 6. The shell won't be too small neither too big, just the perfect bite size. However you're always welcome to pipe them bigger or smaller or even with shapes! 
  •  Meringue: The best meringue for macarons is the italian. So you need to make a syrup: boil 50grs water with 150 grs sugar, and let it reach 100ºC. Once it's at this temperature add it to the egg whites (while they are beating).

Bueno aquí estamos de nuevo en nuestra misión de crear el Macaron Perfecto, y dejadme que os diga que estamos muuuuuuyyyy cerca de conseguir nuestro objetivo!

Vamos a hacer un resumen, en el último post expliqué qué debía tener un macaron para ser perfecto (el pie, la forma, la cáscara exterior debía ser crujiente, el interior tenía que ser blandito y cremoso etc...). Bueno tras investigar un poco más hemos descubierto unos cuantos factores importantes:
  • La clara del huevo: Nada de las pasteurizadas que venden en el supermercado (no seáis vagos y cascar los huevos vosotros mismos!). Es mejor si tú mismo separas la yema de la clara en casa; preferiblemente de huevos que no sean frescos (ni se os ocurra utilizar huevos que llevan más de un mes en vuestra nevera!). Pero huevos que no sean recién comprados, que tengan 1 ó 2 días de antigüedad (aproximadamente). También, MUY IMPORTANTE, 2 días antes de hacer los macarons, separa la clara de la yema y lo conservas en un ból en la nevera (bien tapadito!). Entonces, la víspera de hacer los macarons, saca las claras de la nevera y déjalos en la cocina, a temperatura ambiente. No os asustéis por esto, ya que es así como se hacen los VERDADEROS macarons, todos los pasteleros franceses lo hacen así, por lo que si ellos lo hacen nosotros también!
  • Colorante alimentario: Para obtener los mejores resultados es preferible utilizar colorante en polvo o bien en gel.
  • Temperatura: Tener el horno a 150ºC con calor arriba y abajo y sin el ventilador, y cocinar durante 17 minutos. De todos modos el preferible estar atentos al horno para que no se os quemen estos pequeñines!
  • Boquilla: Tras probar varias boquillas de distintos tamaños, hemos descubierto que la mejor es la del número 6. El tamaño de la cáscara no será ni muy grande ni muy pequeño, el tamaño perfecto para comertelo de un bocado. Aunque siempre los puedes hacer del tamaño que más te guste, incluso hacerlos con formas!
  • Merengue: El mejor tipo de merengue para hacer los macarons es el italiano. Primero debes hacer un almíbar con 50 grs de agua y 150 grs de azucar, lo hierves hasta que alcance 100ºC de temperatura. Una vez alcazada la temperatura lo incorporas muy despacito a las claras (mientras se están batiendo).
Et voilá, this is the result of our second try with macarons! We painted the sweet ones with a bit of food coloring to make them more personal and give them a fun and minimalist look!

Et voilá, éste es el resultado de nuestro segundo intento con los macarons! Los dulces los pintamos con un poco de colorante alimentario para hacerlos más personales y darles un toque divertido y minimalista!


The sweet macaron: filled with a Nestle praliné chocolate ganache (sadly this chocolate can only be found in France).

El macaron dulce: relleno de una ganache de chocolate praliné de Nestle (lamentablemente esta tableta solo se puede comprar en Francia).


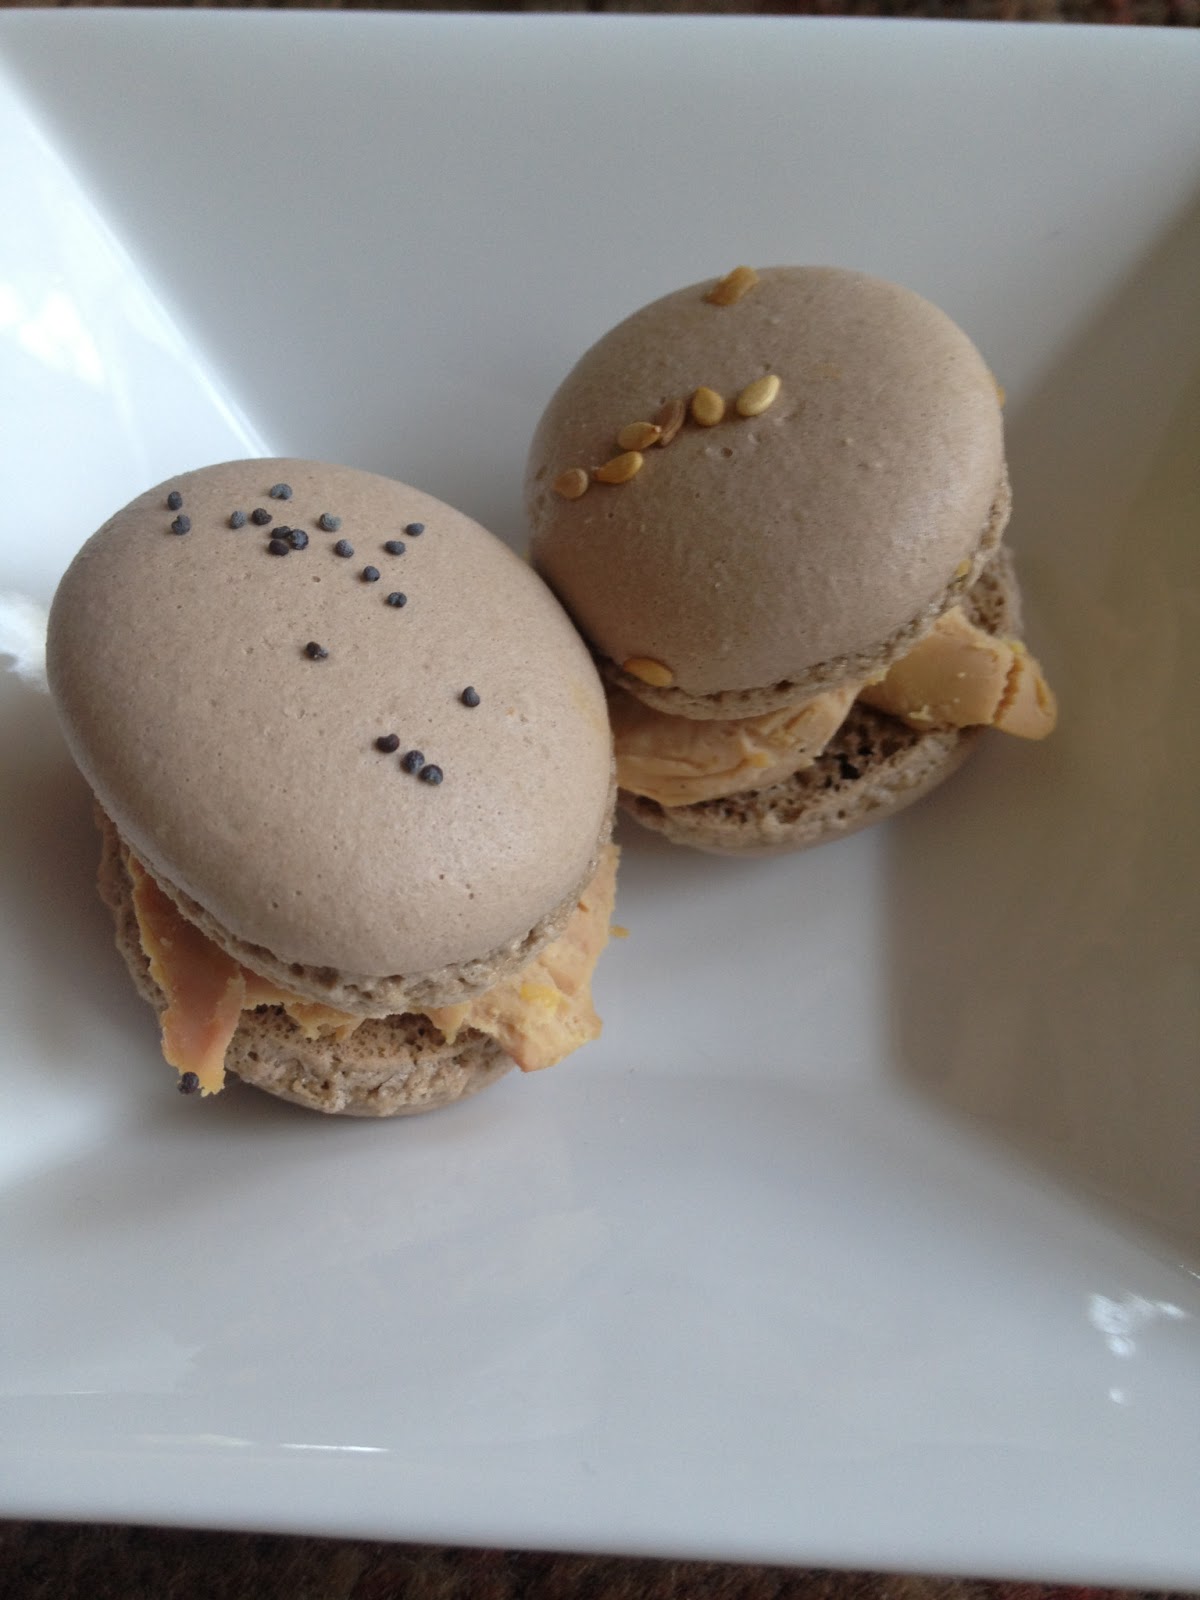
The savory macaron: topped with poppy and sesame seeds and filled with foie gras.

El macaron salado: cubierto por semillas de sésamo y amapola y relleno de foie gras.
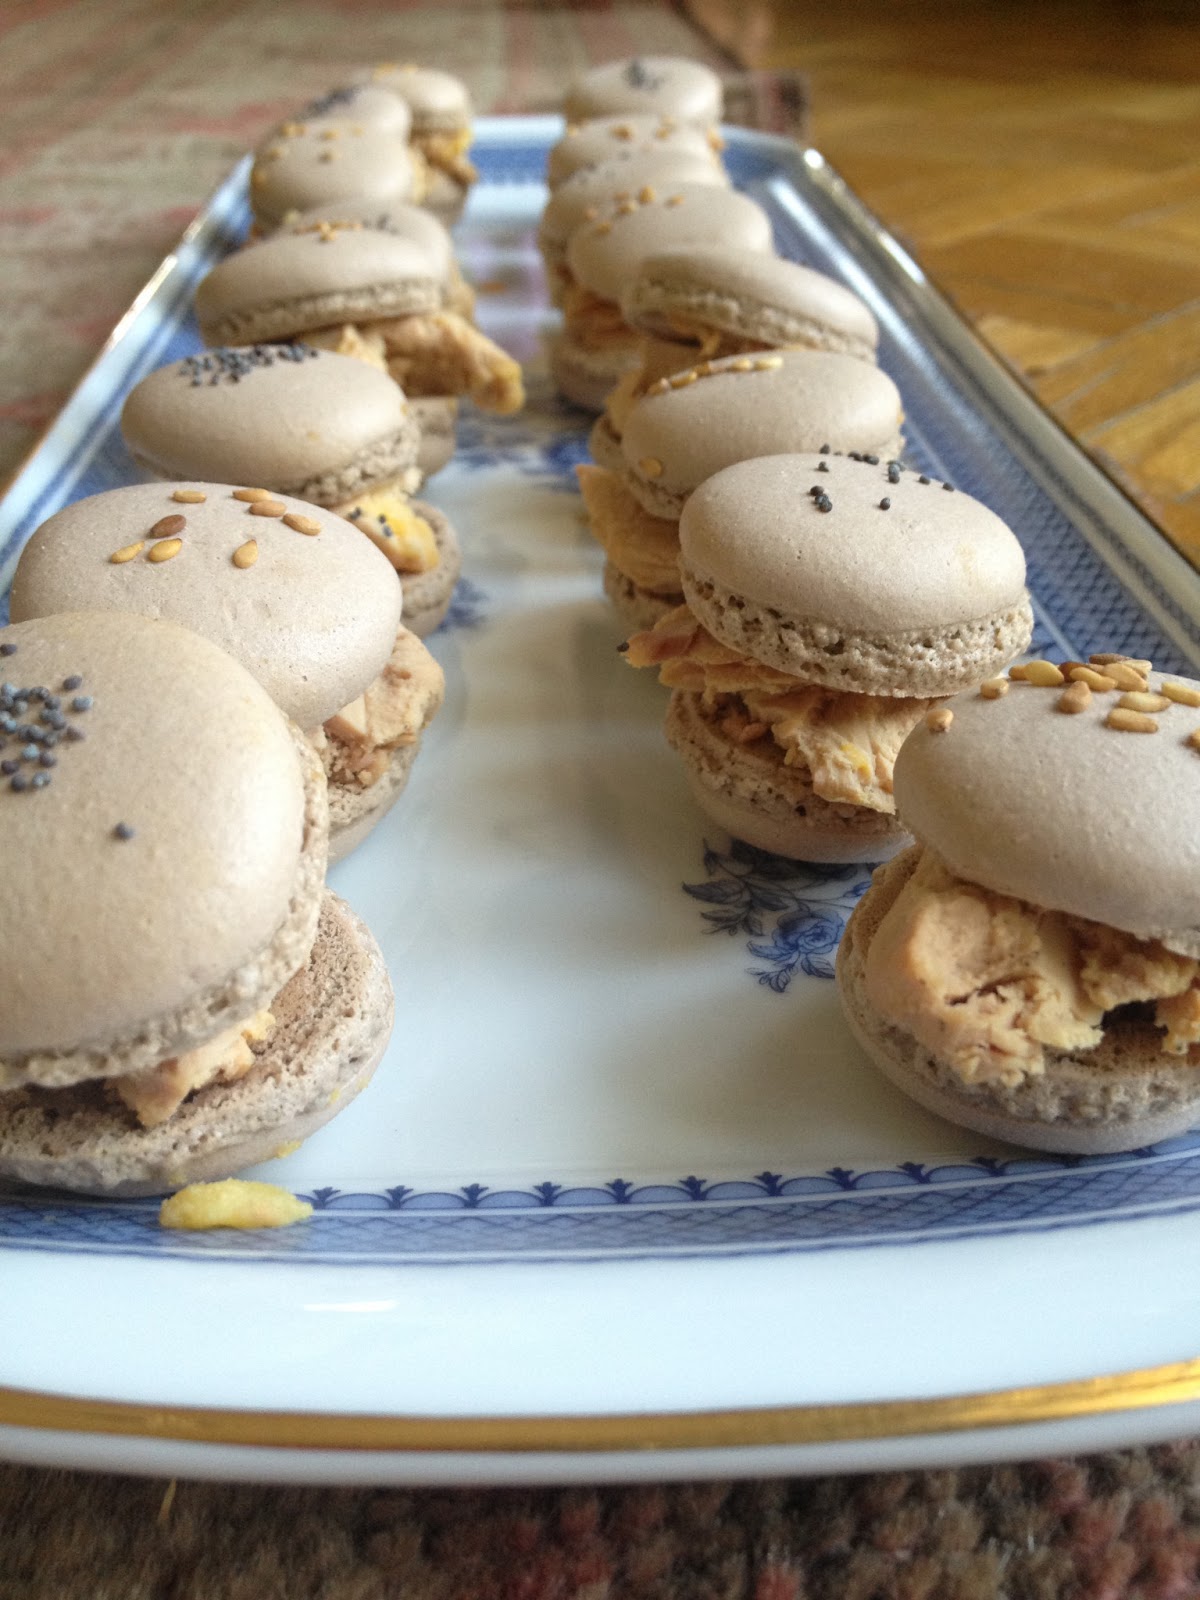

We added these seeds, but feel free to decorate your macarons any way you like!

Nosotras añadimos estas semillas, pero los puedes decorar de la manera que más te guste!
The recipe? We'll post it soon very soon, just let us perfection a few small details, and you'll be free to enjoy the most perfect macarons you've ever had in your life!

¿La receta? Pronto muy pronto la publicaremos, dejadnos que perfeccionemos unos detallitos y podréis disfrutar de los mejores macarons que hayáis probado nunca!

Monday, 4 February 2013

Maple Bacon Cupcakes With Maple Creamcheese Frosting - Cupcakes de Bacon y Sirope de Arce


Bacon? In a cupcake? This time she really has lost it!
NO! I haven't gone mad at all, this is by far one of the best cupcakes I've ever made and eaten.
You must be wondering how I came up with the idea of making a sweet and savory cupcake? Well the answer is "Man vs Food"! Yes the tv show!
About 3 years ago I was watching an episode where Adam Richman visited the Voodoo Donuts store in Portland, Oregon; this donut shop is famous for their maple bacon donut.
The moment I saw that donut I completely fell in love! I needed to eat that donut, or make one similar to it. But suddenly an idea popped in my head..."If there are maple bacon donuts, why not make a maple bacon cupcake? Yes that's it, I need to make it"!
So immediately my search for the best maple bacon cupcake began, and to my surprise there were a huge number of great recipes out there, but none of them convinced me.
Finally several months ago when I had almost lost my hope I found this fantastic recipe, and what's more important, it had great reviews!
But of course there had to be a problem, Pure Maple Extract was the name of that problem. The recipe said that the batter needed to have this extract and it couldn't be changed with Pure Maple Syrup.
Now where on earth was I going to find in Madrid (or Spain) a place where they sold it? I looked everywhere online, I even thought of buying it from Amazon; unfortunately it can't be shipped overseas. 
When I had almost given up, this last Christmas a miracle took place (yes a Christmas miracle, and I'm not crazy). A miracle in the shape of a little bottle with the words Arôme Érable (maple extract) written on it!
Who I need to thank for this miracle? Well the best culinary store in the world Le Meilleur du Chef. They have absolutely anything you need, every single extract you can imagine: from simple vanilla or mint to foie gras or lobster! And they're all fantastic, believe me!

¿Bacon? ¿En un cupcake? Ésta ha perdido el norte por completo! 
Pues NO! No me he vuelto loca, éste es a día de hoy uno de los mejores cupcakes que he comido.
¿Os preguntaréis cómo llegue a la idea de hace un cupcake tanto dulce como salado? Pues la respuesta es "Man Vs Food" (Crónicas Carnívoras)! Sí el programa de televisión!
Hará unos 3 años aproximadamente estaba viendo un capítulo en el que Adam Richman vistaba la pasteleria Voodoo Donuts en Portland, Oregon; esta pasteleria es famosa por su donut con bacon y sirope de arce. 
Me enamoré perdiamente el momento que ví ese donut! Necesitaba comer ese donut, o por lo menos hacer uno parecido. De repente una idea me pasó por la cabeza..."Si hay donuts de bacon con sirope de arce, ¿porqué no hacer un cupcake con bacon y jarabe de arce? Eso es, tengo que hacerlo"!
Inmediatamente me puse a la búsqueda del mejor cupcake con bacon y jarabe de arce, y para mi sorpresa había un gran número de recetas, pero ninguna me convencía del todo.
Finalmente hace unos meses cuando casi habia perdido la esperanza encontré esta receta fabulosa, y lo que para mí es más importante, tení muy buenas críticas!
Pero había un problema, el nombre de ese problema era Extracto Puro de Sirope de Arce. La receta decía que la masa debía llevar este extracto y que no era posible sustituirlo por el sirope en sí.
Y ahora, ¿dónde demonios iba yo a encontrar en Madrid (o en España) una tienda dónde vendan este extracto? Miré online por todas partes, incluso se me ocurrió comprarlo por Amazon, pero tristemente no lo envian a paises fuera de Canadá o EE.UU.
Pero estas pasadas navidades, cuando ya casi me había dado por vencida, ocurrió un milagro (sí un milagro de la Navidad, y nó, no me he vuelto loca). Un milagro en forma de botellita con las palabras Arôme Érable
(extracto sirope de arce) escrito sobre ello! ¿A quién debo agradecer por este milagro? Pues a la mejor tienda culinaria del mundo mundial  Le Meilleur du Chef. Tienen de todo, cualquier cosa que necesites, todo tipo de extractos que puedas imaginar: desde los simples cómo el de vainilla o menta a los más complejos cómo foie gras o langosta! Y todos son fantásticos, hacedme caso!

Finally this last weekend I made the cupcakes, and this is the result!

Al fin este pasado fin de semana hice los cupcakes, y este es el resultado!

I topped it with a sweet maple cream cheese frosting, to die for!

Lo cubrí con un cream cheese frosting con un poquito del extracto de jarabe de arce, para morirse!

Ingredients:
8 - 10 strips of bacon
1 1/3 cup all purpose flour
2/3 cups Cake flour (not self-rising)
2 teaspoons baking powder
1/4 teaspoon salt
213 grs butter (room temperature)
13 grs bacon drippings (cooled and solidified)
2 cups sugar
3 eggs
1 cup milk (room temperature)
2 teaspoons vanilla extract
2 teaspoons maple extract

Directions:
Preheat oven at 190ºC.
Bake the bacon until crisp brown in the oven, set aside and keep the bacon drippings until they solidify (it will go into the cake batter). Dice the bacon.
Lower the heat to 175ºC.
In a medium bowl combine flours, baking powder and salt; set aside. In the bowl of a stand mixer fitted with the paddle attachment, cream the butter, the bacon drippings and sugar for 5 minutes until light and fluffy.
Add the eggs one at a time. Slowly add the dry ingredients and milk in 2 alternating batches. Then add the vanilla and maple extract and finally stir in the diced bacon.
Scoop batter into the pan and bake for 22 minutes.

Maple cream cheese frosting:
250 grs cream cheese
250 grs butter
2 teaspoons maple extract
500 grs icing sugar

Ingredientes:
8 - 10 tiras de bacon
1 1/3 tazas harina normal
2/3 harina especial reposteria (no la que lleva levadura)
2 cucharaditas de levadura
1/4 cucharadita de sal
213 grs mantequilla (a temperatura ambiente
13 grs grasa del bacon solidificada
2 tazas de azúcar
3 huevos
1 taza de leche (a temperatura ambiente)
2 cucharaditas de extracto de vainilla
2 cucharaditas de extracto de sirope de arce

Modo de empleo:
Precalentar el horno a 190ºC
Cocinar el bacon en el horno hasta que esté bien doradito y crujiente, trocearlo y dejarlo a un lado. Guardar la grasa que haya soltado el bacon y dejar enfriar (se incorporará en la masa del bizcocho).
Bajar la temperatura a 175ºC.
En un ból mediano mezclar las harinas (tamizadas, claro), la levadura y la sal; dejar a un lado. En el ból de la batidora (con la herramienta que es cómo una pala), mezclar la mantequilla. la grasa del bacon solidificada y el azúcar durante 5 minutos hasta que quede una masa cremosa y ligera.
Añadir los huevos de uno en uno. Poco a poco incoporar los ingredientes secos junto con la leche en 2 tandas. Luego se añade la vanilla y el extracto de arce. Finalmente incorporar el bacon troceado.
Poner la masa en el molder y cocinar unos 22 minutos.

Maple Cream cheese frosting:  
250 grs queso crema
250 grs mantequilla
2 cucharaditas extracto de arce
500 grs azúcar glaçé

Sunday, 27 January 2013

The Daring Bakers January Challenge - Gevulde Speculaas


Francijn of Koken in de Brouwerij was our January 2013 Daring Bakers’ Hostess and she challenged us to make the traditional Dutch pastry, Gevulde Speculaas from scratch! That includes making our own spice mix, almond paste and dough! Delicious!


The Daring Bakers' January 2013 challenge was hosted by Francijn from "Koken in de Brouwerij", and she challenged us to do a typical Christmas dutch sweet treat called Gevulde Speculaas. It's basically a spiced cookie (or slice) filled with almond paste.
The rules were that we had to make our own almond paste and mix our own spices for the Speculaas dough. The only variations allowed were concerning the shape and almond decoration of the pastry.
Overall the recipe seemed simple and had a very low level of difficulty; however the only matter of concern to me was making my own spice, the dough asked for 9 spices in total, most of them really difficult to find in a regular supermarket in Spain. Nevertheless as it was my first challenge as a new member of The Daring Bakers, I didn't give it a lot of thought and went ahead with it!

La anfitriona de este mes para el reto de The Daring Bakers era Francijn de "Koken in de Brouwerij", y nos propuso hacer una delicia navideña típica Holandesa llamada Gevulde Speculaas. Basicamente es como una galleta especiada (o barrita) rellena de pasta de almendra.
La reglas era que debíamos preparar nuestra propia pasta de almendra casera y también la mezcla de las especias para la masa de las Speculaas.
Las únicas variaciones permitidas eran en referencia a la forma del dulce y la decoración de las almendras sobre la masa de éste.
Por lo general la receta parecia muy simple y con un nivel de dificultad relativamente bajo; aunque lo único que me preocupaba era el hecho de hacer mi propia mezcla de especias, la masa pedía hasta 9 especias distintas, muchas de ellas realmente difíciles de encontrar en cualquier supermercado de España.
Pero al ser mi primer reto como nuevo miembro de The Daring Bakers, no me lo pensé demasiado y decidí seguir adelante con ello!


First I made a day ahead the almond paste, as the recipe said that if made this way the taste would be better.

Lo primero que hice con un día de antelación fue la pasta de almendra, ya que la receta decía que si se hacía un día antes ésta tendría mejor sabor.


The next part was the most challenging, as I had to grind some of the spices.
I had to make a little variation in the spices; the recipe asked for mace and as it was impossible for me to find it anywhere (both in France and Spain) I had to substitute it for a little bit more of nutmeg.

La siguiente parte era la más complicada, ya que debía triturar algunas de las especias.
Tuve que hacer una pequeña variación en las especias; en la receta ponía que había que utilizar macis pero me resultó imposible encontrarlo (y eso que busqué tanto en supermercados de Francia y España) por lo que finalmente utilicé como sustiuto un poco más de nuéz moscada de lo que la receta en sí ya pedía.


All spices mixed together (I had to grind both the anise and coriander!). 

Todas las especias ya mezcladas (trituré tanto el anís estrellado como las semillas de cilantro!).


Now I was ready to assemble the Speculaas dough...

Ya estaba preparada para hacer las masa de las Speculaas...

I left it in the fridge a few hours...Then divided the dough into two portions: one for the lower layer and another for the upper.

La dejé enfriar en la nevera un par de horas... Luego la dividí en dos porciones: una para la capa de abajo y otra para la superior.
Rolled out the first layer and brushed it with an egg wash.

Estiré la primera capa y la pinté con un pco de huevo batido.
 Covered it with the almond paste (sorry no photo!), again brush it with the egg and again added the last layer of the Speculaas dough.

Lo cubrí con la pasta de almendra (se me olvidó sacarle una foto!), y otra vez lo pinté con más huevo y finalmente añadí la última capa de la masa de Speculaas.

 More egg, and finally decorated it with whole raw almonds.

Más huevo, y por fín lo decoré con almendras enteras y crudas.

 Baked in the oven for 40 min at 180ºC... Et voilá!

Lo horneé durante 40 min a 180ºC...Et voilá!

Personally I didn't like the cookie that much, as the flavours in it were too strong, very similar to gingerbread cookies. I believe you must be a fan of strong and aromatic flavours and spices to love this kind of dessert, and sadly I'm not.
Anyway at home, both my father and sister absolutely looooved it, they even want me to bake it again!


Personalmente no me gustó mucho esta galleta, ya que los aromas en él eran demasiado fuertes, muy parecidos a las galletas de gengibre. Creo que uno debe ser muy admirador de especias muy fuertes y aromáticas para que te guste este tipo de postres, tristemente yo no lo soy.
Aun así en casa, tanto a mi padre como a mi hermana les entusiasmó, tanto que quieren que lo vuelva a hacer!

Ingredients:
How to mix the spices:
1 teaspoon of ground cloves
1/2 teaspoon of mace ( I used nutmeg)
1/2 teaspoon of ground ginger
1/2 teaspoon white pepper
1/2 teaspoon cardamom
1/2 teaspoon of ground coriander
1/2 teaspoon of anise
1 teaspoon of nutmeg (including the other 1/2 if you don't have mace)
Measure the amount of spices you have and add an equal amount of cinnamon.

Almond paste:
125 gr ground almonds
125 gr granulated sugar
1 large egg
1 teaspoon lemon zest
Directions:
Grind sugar, almonds, egg and lemon zest together in a food processer. Store in the refrigerator for one day or two, the taste gets better as days pass.

Speculaas Dough:
1 3/4 cups (250 gr) all purpose flour
1 teaspoon baking powder
3/4 cup (150 gr) brown sugar
Pinch of salt
2 tablespoons speculaas spices
3/4 cup (175 gr) unsalted butter
Directions:
Put flour, baking powder, sugar, salt and spices in a bowl. Cut the butter in dices and add.
Knead until smooth.
*I had to add a little bit of milk as the dough was too dry
Wrap in cling foil and put in the refrigerator for two hours.


Ingredientes:
Para la mezcla de especias:
1 cucharadita de clavo
1/2 cucharadita de macis (yo utilicé nuéz moscada)
1/2 cucharadita de gengibre
1/2 cucharadita de pimienta blanca
1/2 cucharadita de cardamomo
1/2 cucharadita de cilantro polvo
1/2 cucharadita de anis en polvo
1 cucharadita de nuéz moscada (además de lo que ya hemos puesto antes).
Pesa la cantidad total de especias y añade la misma cantidad de canela.

Pasta de almendra:
125 gr de almendra en polvo
125 gr de azúcar
1 huevo grande
1 cucharadita de ralladura de limón
Modo de empleo:
Mezcla la almendra, el azúcar, el huevo y el limón en una trituradora de comida y conservaló en la nevera durante uno ó dos días ya que con el tiempo coge mejor sabor.

Masa de Speculaas:
250 gr harina 
1 cucharadita de levadura
150 gr azúcar moreno
Pizca de sal
2 cucharadas soperas de especia de speculaas
175 gr de mantequilla
Modo de empleo:
pon la harina, azúcar, levadura, sal y especias en un ból. Añade la mantequilla cortada en trozos. Mezclalo todo hasta formar una bola
* Yo añadí un poco de leche ya que la masa estaba demasiado seca.
Envuelvelo en film y dejalo reposar en la nevera durante dos horas.

Tuesday, 22 January 2013

Chocolate Cupcakes with Crunchy Fried Corn - Cupcakes de Chocolate y Kikos!


Fried corn? Has she gone mad? No, absolutely not! Actually fried corn or Kikos (as they are called in spain) match perfectly well with chocolate! They add a salty and crunchy twist that will make you a fan of this couple immediately!
Let me tell how I came up with this idea...

For a while ago I've been wanting to try a new vanilla cupcake recipe, as I'm always eager to experiment with new recipes.
The cake turned out pretty good, not too sweet, so this meant that it could be topped either with a sweet buttercream or ganache. But which one? A classic vanilla or chocolate? 
I decided to go with chocolate, however the little voice in my head kept on saying "that's too boring, do something fun, creative and original".
Suddenly a little bulb lit on top of my head! What if I add some crushed Kikos to the frosting? If there are recipes with walnuts, almonds or hazelnuts, why not this?!
So without giving it a second thought I proceeded to create this delicious treat!

¿Maíz frito? ¿Se ha vuelto loca? No, para nada! En realidad el maíz frito o Kikos  (como los llamamos aquí en España) hacen una estupenda pareja con el chocolate! Le añaden un toque salado y crujiente que te enganchará a este "matrimonio" inmediatamente!
Dejadme que os cuente cómo se me ocurrió esta idea...

Desde hace un tiempo llevo queriendo probar una nueva receta de cupcakes de vainilla  ya que siempre estoy dispuesta a experimentar con nuevas recetas.
El bizcocho salió fantástico, no demasiado dulce, por lo que pedía ser cubierto con un buttercream o ganache dulce. ¿Pero cuál? ¿El clásico de vainilla  o chocolate?
Opté por el de chocolate, pero la vocecita de mi cabeza me decía " eso es demasiado aburrido, haz algo divertido, creativo y original". 
De repente se me iluminó una bombilla sobre mi cabeza! ¿Y se le añado unos kikos machacados a la cobertura? Si hay recetas que llevan nueces, almendras o avellanas, ¿por qué no esto?!
Y sin pensarmelo dos veces me decidí a llevar a cabo esta deliciosa creación!


 First ground the kikos
Primero tritura los kikos

Mix with the ganache or chocolate buttercream (whatever you like!)
Mezclalo con la ganache o buttercream (lo que prefieras!)


Prepare a piping bag...
Prepara una manga pastelera...

ET VOILÁ!
Ingredients for the vanilla cupcakes:
1 1/4 cups cake flour
1 1/4 teaspoons baking powder
1/2 teaspoon salt
2 eggs
3/4 cups sugar
1 1/2 teaspoon vanilla extract
1/2 cup vegetable oil
1/2 cup buttermilk

In a bowl stir the flour, baking powder and salt, set aside.
Beat eggs, add sugar gradually. Add vanilla and oil, keep beating.
Slowly add half of the flour mixture and half of the buttermilk, beat well and add the rest. Beat until combined.
Pour the batter into the cups and bake at 180ºC for 12 to 14 minutes.

Ingredients for the chocolate and kikos frosting:
75 gr dark chocolate
100 ml cream
65 gr butter
100 gr icing sugar
crushed kikos

In a pan, heat the cream with the butter, once it's melted and before it boils add the chocolate. When the chocolate has melted add the sugar. Stir until well combined.
Let it cool in the fridge, and once it's thick and creamy add the crushed kikos.

Ingredientes para los cupcakes de vainilla:
1 1/4 tazas de harina de reposteria
1 1/4 cucharaditas de levadura
1/2 cucharadita de sal
2 huevos
3/4 taza de azúcar
1 1/2 cucharadita de extracto de vainilla
1/2 taza aceite vegetal
1/2 taza buttermilk

Mezclar la harina, levadura y sal. Dejar aparte.
Batir los huevos y añadir poco a poco el azúcar. Incorporar la vainilla y el aceite.
Añadir la mitad de la mezcla de la harina y del buttermilk, batir bien, finalmente añadir el resto que queda.
Poner la masa en los moldes individuales y cocinar en el horno a 180ºC durante 12-14 minutos.

Ingredientes para la cobertura de chocolate y kikos:
75 gr chocolate negro para postres
100 ml nata líquida
65 gr mantequilla
100 gr azúcar glaçé
kikos machacados

En una cacerola, calentar la nata con la mantequilla, una vez ésta se haya derretido y antes de que hierva se añade el chocolate. Cuando el chocolate esté derretido incorporar el azúcar. Mezclar bien.
Enfriar en la nevera hasta que esté cremoso y espeso. Mezclar los kikos machacados.


Wednesday, 16 January 2013

Braulia's Polvorones - Los Polvorones de Braulia


I want to apologize for not having been updating new posts and recipes, but the last weeks have been awfully hectic; from Christmas holidays, to small trips to the South of France and even a bachelorette party weekend in Seville (not mine if you're wondering!).
Anyway, we are back and really looking forward to this new year!

Quiero disculparme por no haber actualizado nuevos posts y recetas, pero he pasado varias semanas tremendamente ajetreadas; desde las vacaciones de Navidad, a viajes relámpago al sur de Francia e incluso una despedida de soltera en Sevilla (no era la mía por si os lo estabais preguntando!).
En fín, estamos de vuelta y con muchas ganas de ver que  nos depara este año nuevo!


So, less talking and more baking!
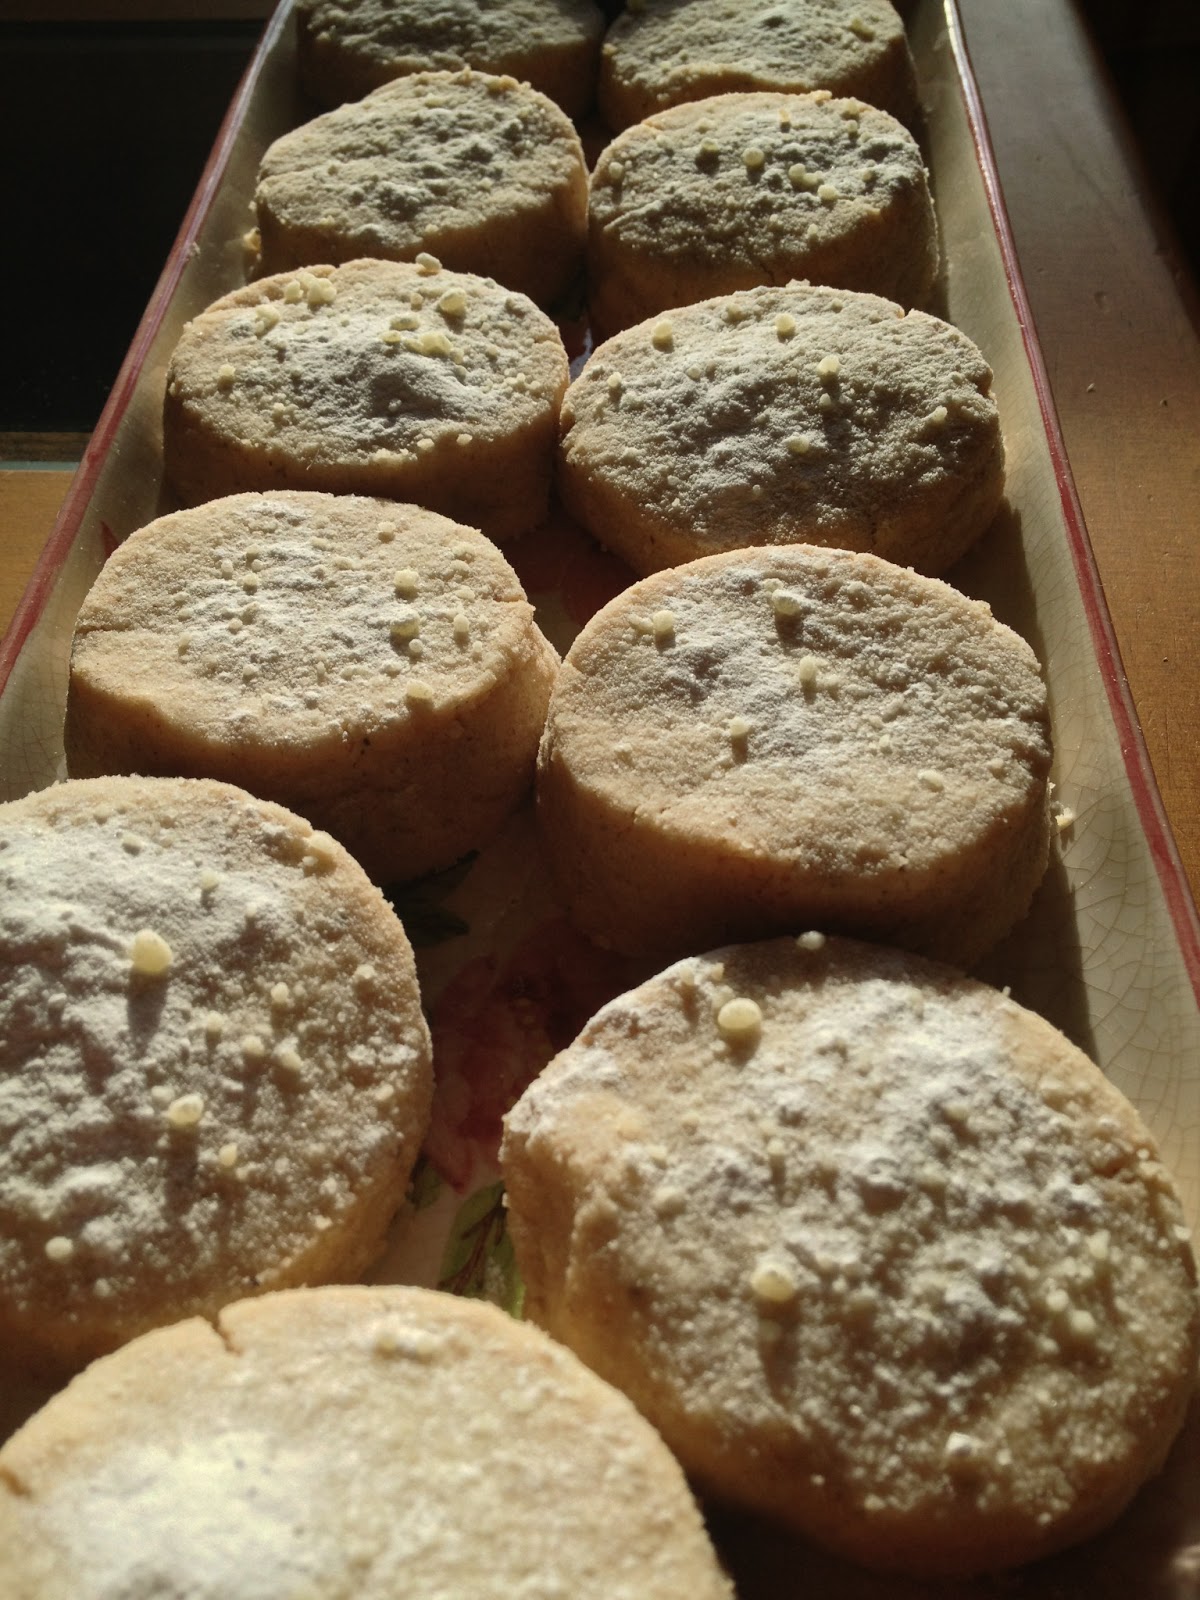
For today I have a traditional and delicious Spanish Christmas sweet: Polvorones.
They are extremely simple to make, and highly addictive too!
Do you want to know the best part? It just has 4 ingredients: flour, sugar, lard and cinnamon. All mixed together, baked in the oven; et voilá!
If you've never tried them, I really don't know what you're waiting for? There really is no excuse not to eat them!


Bueno, menos cháchara y más cocinar!
Para hoy tengo un dulce navideño típico Español: Polvorones.
Son tremendamente fáciles de elaborar, y muy adictivos también!
¿Quieres saber la mejor parte? Solamente tiene 4 ingredientes: harina, azúcar, manteca de cerdo y canela. Se mezclan todos y después se hornean; et voilá!
Si nos los has probado,¿a qué estás espeando? No hay excusa que valga para no comerlos!


Monday, 31 December 2012

Happy New Year - Feliz Año Nuevo


 Our dinner table.
Nuestra mesa.

From Braulia's Kitchen we wish everyone a very happy new year 2013. Superstitions aside we're sure this will be a great year!
To say goodbye I'll leave you with a little sneak peak of our Christmas Eve dinner!

Roast Turkey(stuffed with pain d'epices, minced pork meat, chestnuts, pine nuts, raisins, prunes, truffle and port wine)
Pavo asado (relleno con pain d'epices, carne de cerdo picada, castañas, piñones, pasas, ciruelas, trufa y oporto)

Desde Braulia's Kitchen queriamos desear a todo el mundo un muy feliz año nuevo 2013. Echando a un lado cualquier superstición estamos seguras que este será un gran año!
Para despedirme os dejo un pequeño adelanto de lo que fue nuestra cena de Noche Buena!

Foie Gras with caramelised onions, king prawns, Smoked salmon from Ramest with blinis and creme fraiche
Foie Gras con cebolla caramelizada, Langostinos, Salmon ahumado de Ramest con blinis y creme fraiche

 Roast Turkey with the stuffing on the side, chestnut puree, apple sauce and red cabbage
Pavo asado con el relleno aparte, puré de castañas y de manzana y lombarda
And for dessert...

Y de postre...
Bûche de Noël

Mango mousse filled with fresh passion fruit pulp over a base of homemade meringuettes, covered with a white chocolate ganache and decorated with fresh pomegranate and more meringuettes!

Mousse de mango relleno de pulpa de maracuyá sobre una base de mini merengues caseros, cubierto con ganache de chocolate blanco y decorado con granada y mas merenguitos!


Saturday, 22 December 2012

Mission Perfect Macaron (Part 1) - Misión Macaron Perfecto (Parte 1)

At Braulia's Kitchen we're on a mission, make THE PERFECT MACARON!

En Braulia's Kitchen tenemos una misión, crear EL MACARON PERFECTO!


We've never been huge fans of Macarons, we don't love them but don't dislike them either. We've obviously tried the best of the best in France at Laduree, Pierre Herme and Thierry Bamas, and even at Picard, but we never felt it was that kind of dessert that you can't live without.
But if you really want to become a great baker, you must do every recipe and dessert, and you must masterize it.
So after thinking about it over and over again, we finally came to the following conclusion: We MUST make Macarons, and they'll be outstanding!
We've been researching, documenting, reading every single recipe, tip, review, article... Basically every 101 on Macaron out there, just to know what was awaiting us.
Apparently to reach the goal a perfect Macaron needs to have the following:
  • Smooth tops (no bubbles or tips from when pipping them).
  • The outside must be crispy, whilst the inside will be nice, moist and chewy, what the french call "moelleux".
  • It will always have a foot at the bottom of the shell - no foot no Macaron.
  • A perfect round shape (really important) so the top and bottom shells can match once they are put together. 
Nunca hemos sido grandes fans de los Macarons, no los amamos, pero tampoco nos disgustan. Claramente hemos probado lo mejor de lo mejor que hay en Francia, cómo los de Laduree, Thierry Bamas, Pierre Herme e incluso los de Picard, pero nunca hemos tenido esa sensación que era un postre con el cual nos era imposible vivir sin él.
Pero si realmente quieres ser un experto en pastelería , tienes que probar todas las recetas y postres que hay y se deben dominar.  

Así que después de pensarlo una y otra vez, por fin llegamos a la siguiente conclusión: hay que hacer Macarons, y van a salir estupendos!
Hemos estado investigando, documentándonos, leyendo todas las diferentes recetas, artículos, consejos... Básicamente cada 101 que hay sobre los Macaron, sólo para saber lo que nos esperaba.
Al parecer, para alcanzar la meta de un Macaron perfecto éste debe tener lo siguiente:

  •  Una superficie completamente lisa (sin burbujas o puntas que pueden salir a causa de la manga pastelera).
  • Por fuera deben ser crujientes, mientras que el interior tiene que ser suave, un poco chicloso, lo que los franceses llaman "moelleux". 
  • La parte inferior de la carcasa siempre tiene un pie - si no hay pie no hay Macaron.
  •  Una perfecta forma redonda (esto es realmente importante) para que tanto la carcarsa superior como la inferior encajen bien.
Having these basic rules in mind, ahead we went to create our first Macaron.

Teniendo en mente estas normas básicas, decidimos seguir adelante y crear nuestro primer Macaron.


The results we actually better than expected; the taste was fantastic (believe me when I say this, as I myself don't fancy Macarons that much!), the consistency was great, and they did look very pretty too.
But of course they weren't perfect! Our main concerns right now are improving the shape and finding the perfect oven temperature and cooking time.
So we'll keep on practicing in order to reach perfection!
Beware Laduree, we are close to making just as great macarons as yours!

Los resultados fueron mejor de lo esperado; de sabor salieron fantásticos (creerme cuando digo esto porque los macarons no están dentro de mis gustos favoritos!), con muy buena consistencia, y visualmente preciosos.
Pero claro no eran perfectos! Ahora nuestros objetivos son mejorar la forma y controlar la temperatura y tiempo del horno.
Por lo que vamos a seguir practicando para llegar a la perfección!
Ojito Laduree, estamos muy cerca de hacer Macarons tan buenos como los vuestros!